| |
Bridged network for VM.
If you run a server on the VM, it should be accessible from the Internet,
so the interface on the hypervisor needs to be bridged.
Setting the bridged network.
Shutdown the VM:
Install the packages neede for bridging:
apt-get install qemu bridge-utils
|
Configure the bridged interface: edit file /etc/network/interfaces,
comment the lines with eth0.
Add the configuration for br0 interface. The configuration file
now should look as follows:
# The loopback network interface
auto lo
iface lo inet loopback

# The primary network interface
#auto eth0
#iface eth0 inet manual

# The bridging interface
auto br0
iface br0 inet dhcp
        bridge_ports eth0
        bridge_stp off
        bridge_fd 0
        bridge_maxwait 0
|
Restart the network:
/etc/init.d/networking restart
|
Check if an IP address has been assigned to interface br0;
ifconfig br0 | grep -w 'inet'
|
Edit file /etc/sysctl.conf and add the following to the bottom:
# prevent bridged traffic from being processed by iptables rules
net.bridge.bridge-nf-call-ip6tables = 0
net.bridge.bridge-nf-call-iptables = 0
net.bridge.bridge-nf-call-arptables = 0
|
Push the settings to the kernel by running the following command:
sysctl -p /etc/sysctl.conf
|
Configure CentOS6.2 VM for the bridged network: in virt-manager,
follow the illustrated procedures:
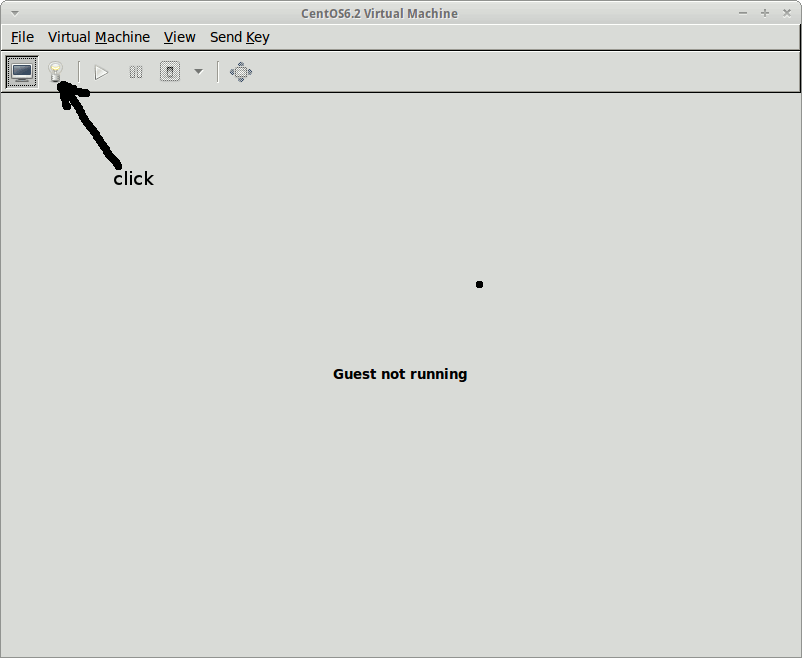
In virt-manager,
select the VM, CentOS6.2
 , ,
Click onto the configuration icon
 , ,
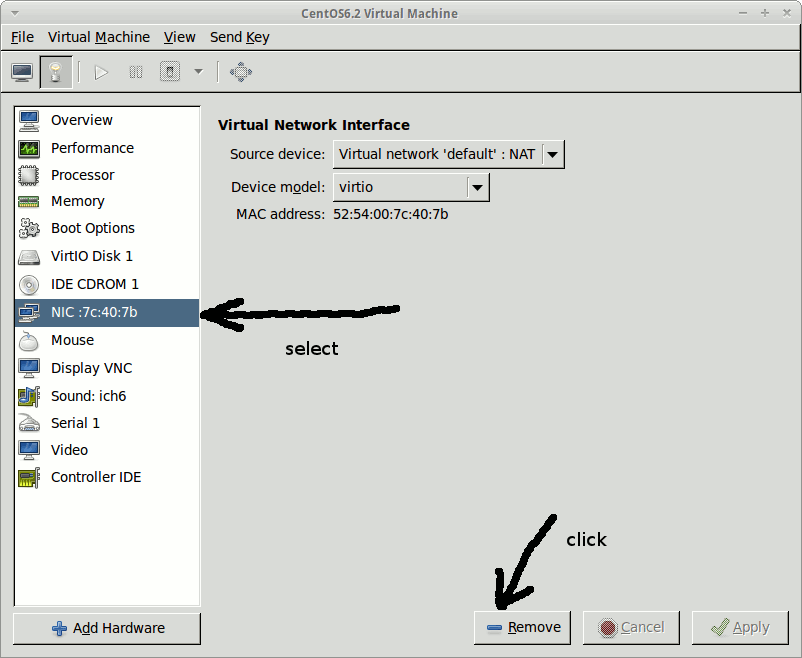
Remove the interface
 , ,
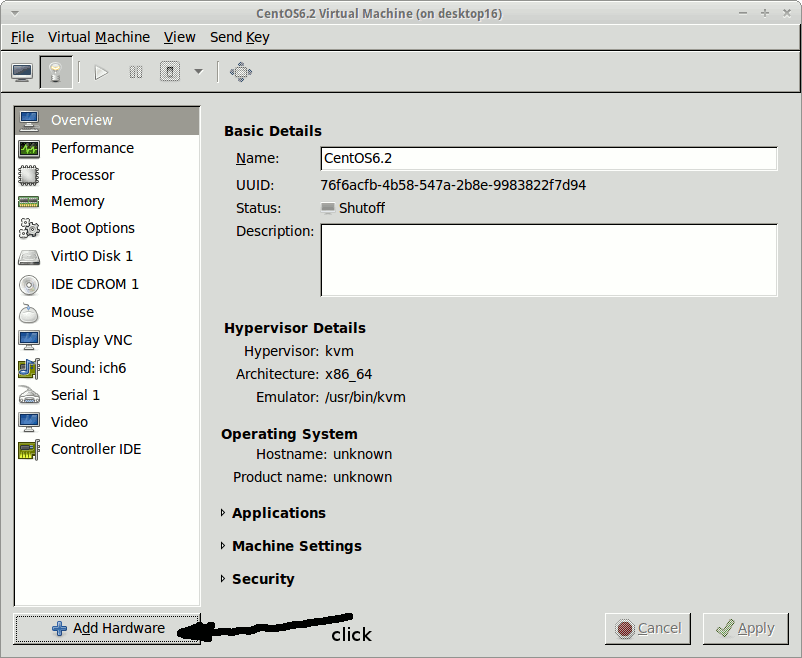
Add hardware
 , ,
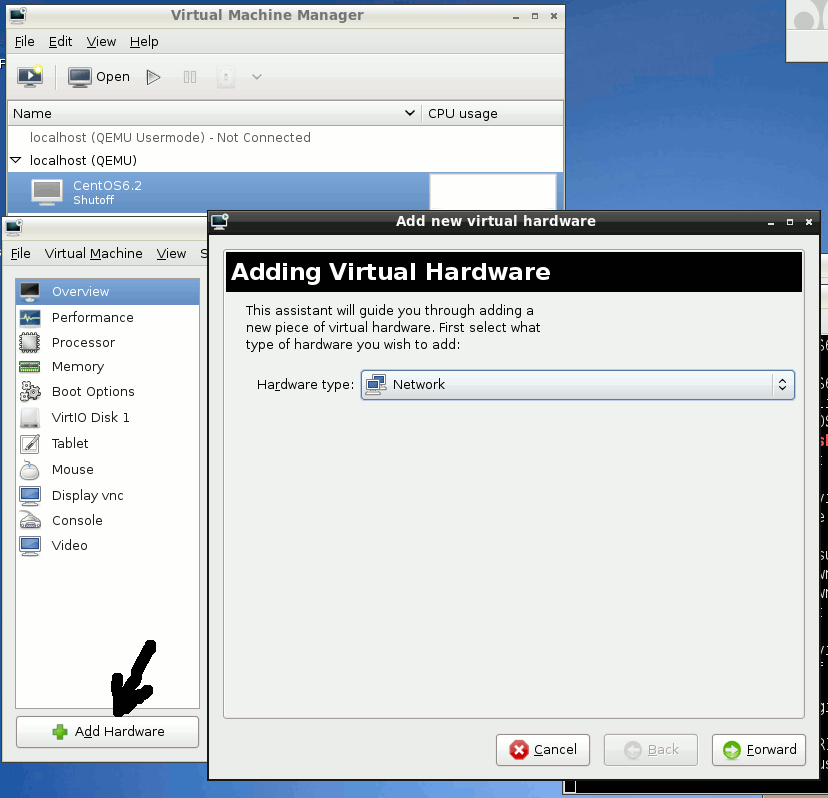
Add bridged network
 , ,
Add br0 interface
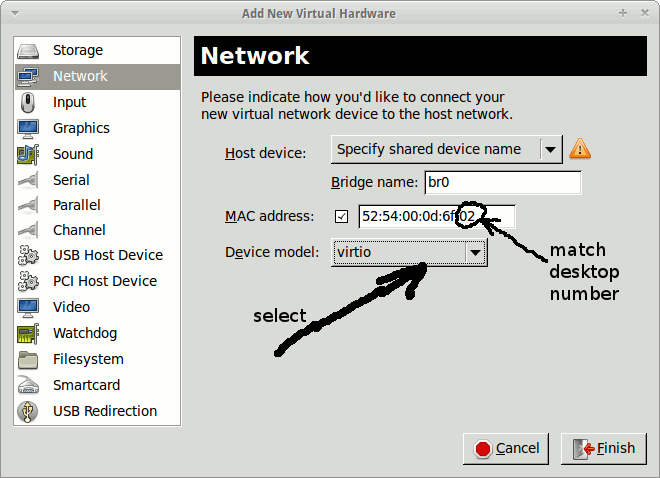
In the above, set the last number in the MAC address to that of your desktop, for
example 02 if you are on desktop02. For the device model, select virtio
Start then VM, then login to its console
virsh start CentOS6.2
virsh console CentOS6.2
|
Then execute the following command on the VM
cp /dev/null /etc/udev/rules.d/70-persistent-net.rules
reboot
|
After rebooting, the VM should acquire an IP address on the Linux class subnet. Check the new IP address on CentOS6.2 VM:
It should be within 192.168.5.0 subnet.
Shutdown the VM:
Restore the original NAT network settings for CentOS6.2 VM by following the procedure below:
cp CentOS_VM/CentOS6.2.xml  /etc/libvirt/qemu
virsh define /etc/libvirt/qemu/CentOS6.2.xml
virsh start CentOS6.2
|
When the system boots up, login to the console:
Then execute the following command on the VM
cp /dev/null /etc/udev/rules.d/70-persistent-net.rules
reboot
|
After rebooting, the VM should acquire an IP address on the NAT virtual
network, 192.168.122.0. Verify it by running command
|
|