
Picture 1 - Starting the disk partitioner
Last updated $Date: 2007-10-21 03:59:25 $
Martti Kuparinen <martti.kuparinen@iki.fi>
http://www.iki.fi/kuparine/comp/ubuntu/en/cryptolvm.html
According to our company policy all laptop computers must use hard drive encryption to protect the sensitive data in case the computer (or just its hard drive) is lost or stolen. This document describes how I created the disk partitions on my Dell Latitude D630 to conform to the company policy. After the initial installation I used my own installation helper script to finish the installation and configuration.
I wanted deploy hard drive encryption not just for one directory or one file system but for (almost) the whole hard drive. Why "almost"? Well, the Linux kernel needs to be found by the boot loader (grub) so that computer can be booted into Linux. That's why the /boot directory is put on a small, separate file system which is not encrypted. Everything else can be then encrypted.
I started installation with the "Alternate install CD" and I selected
"Manual" in the beginning of disk partitioning (picture 1). You could
of course select "use entire disk and set up encrypted LVM" but that
creates one big root file system (/) and a swap. But as I want to have
a separate file system for the user data (/home) I configured everything
manually.
Picture 1 - Starting the disk partitioner
Next I created a small partition for the /boot filesystem. 200 MB should be
enough to hold multiple kernels in case you need to keep old kernel around
for some reason. Don't make this too small either, if you later need more
disk space in /boot you need to backup and reinstall everything!

Picture 2 - Two empty disks
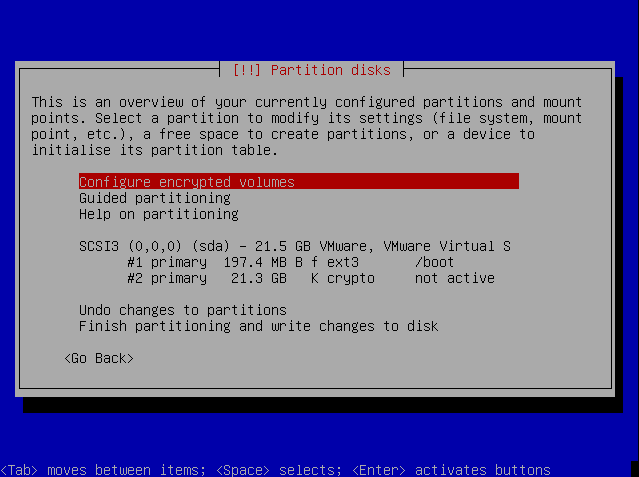
After creating the /boot file system I created a new file system which uses
the remaining disk space (picture 3). Please note how the file system type
is set to "physical volume for encryption" instead of the usual ext3
(picture 4).

Picture 3 - Using the remaining space for encrypted file systems
Picture 4 - Disk partition for encrypted file systems
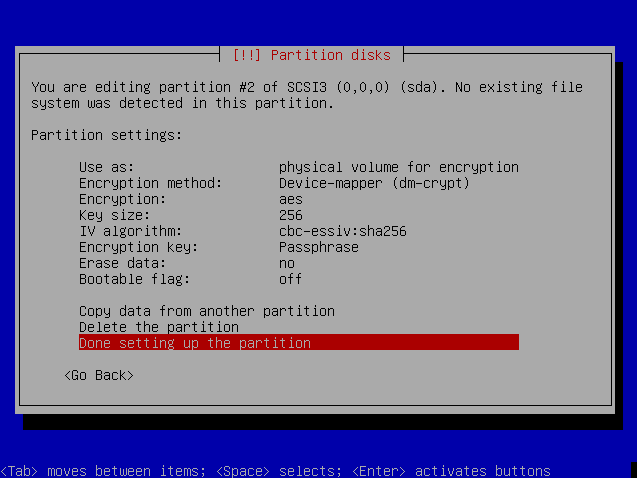
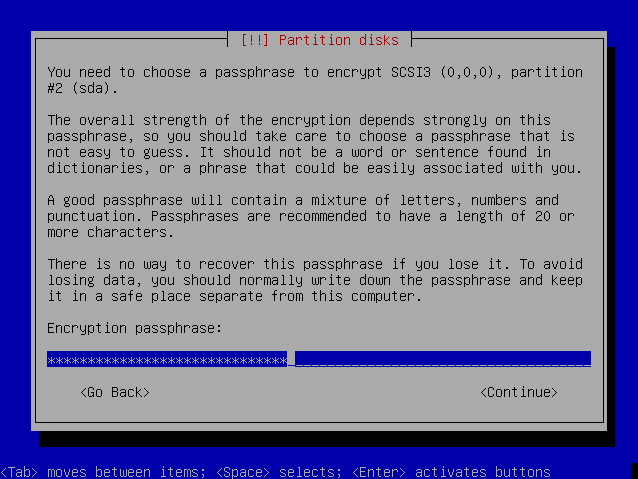
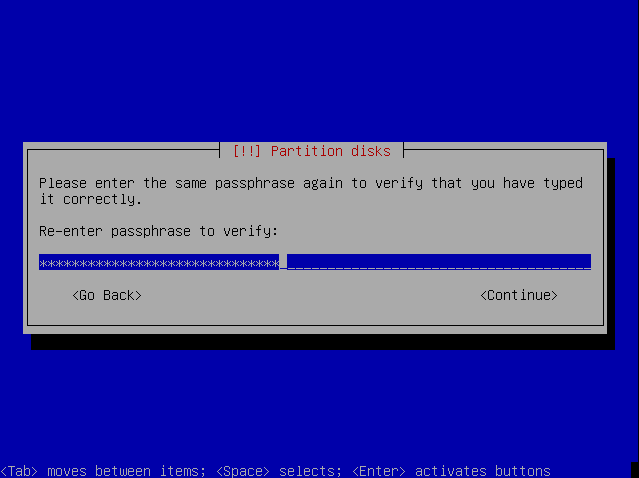
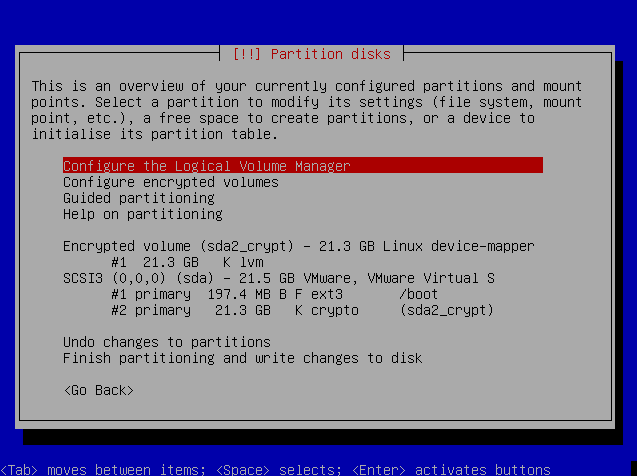
After creating the physical disk partitions I started to configure the
encrypted volume (picture 5). I selected a long-and-hard-to-guess
passphrase (pictures 6 and 7).
Picture 5 - Configuring the encrypted volume
Picture 6 - Selecting a passphrase
Picture 7 - Verifying the passphrase
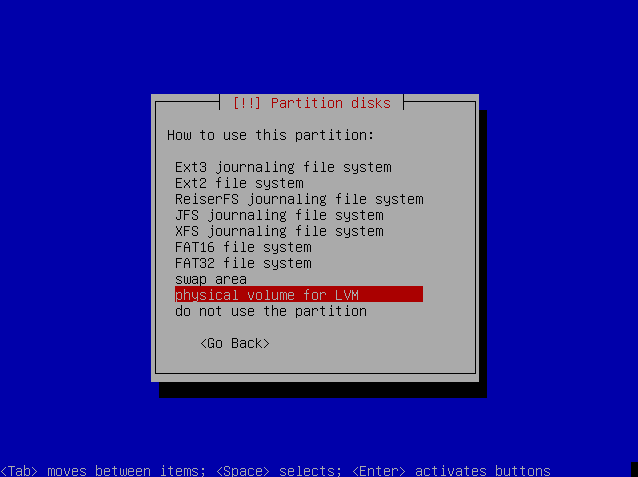
Once done with the encrypted volume configuration I had a new file system
in the disk partitioner (picture 8). But as I wanted to have more than
one file system inside that encrypted volume I presses Enter (picture 8)
and changed the file system type from ext3 to "physical volume for LVM"
(picture 9). By using logical volume manager (LVM) I could create multiple
file system on top of my encrypted volume.

Picture 8 - Modifying the encrypted volume
Picture 9 - Changing the file system type
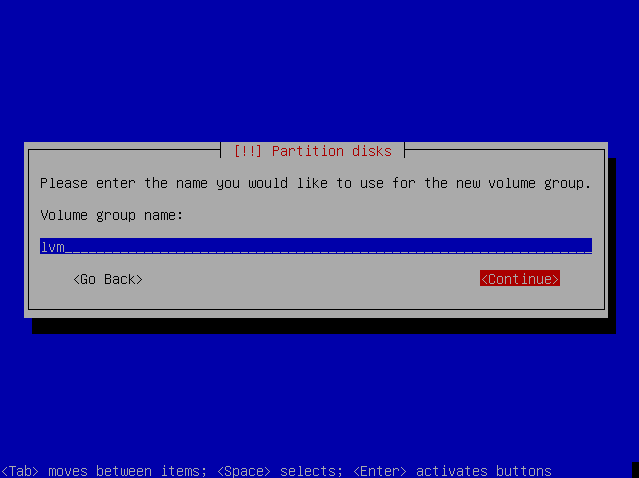
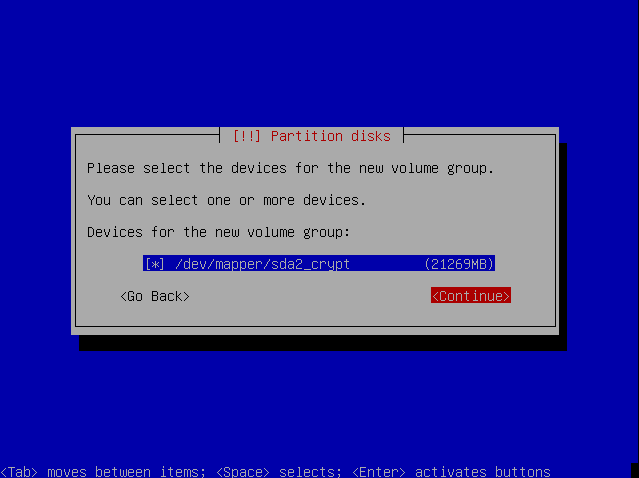
Next I started to configure the logical volume manager (picture 10). I created
one volume group (VG) (picture 11) called "lvm" (picture 12) which uses the
encrypted volume as the "physical disk" (picture 13).
Picture 10 - Configuring the LVM

Picture 11 - Creating one VG
Picture 12 - Giving name to the VG
Picture 13 - Using the encrypted volume
After creating one VG I created three logical volumes (LVs) inside
the VG (picture 14). The first LV is called "root" (picture 15) and is
8 GB (picture 16). The seconds LV is called "swap" and is 512 MB. The
third LV is called "home" and it uses the remaining space.
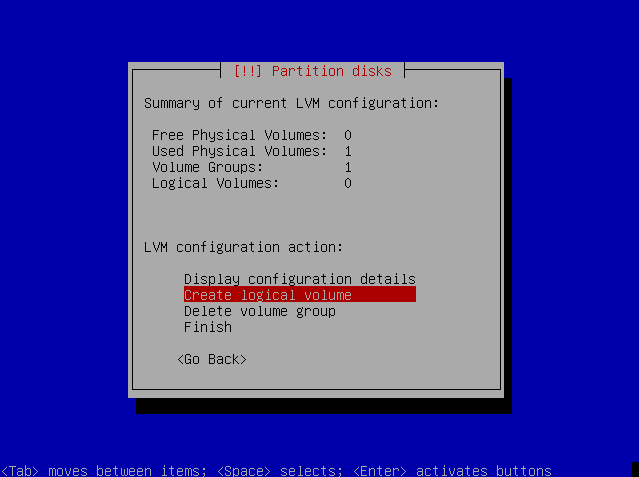
Picture 14 - Creating new LVs
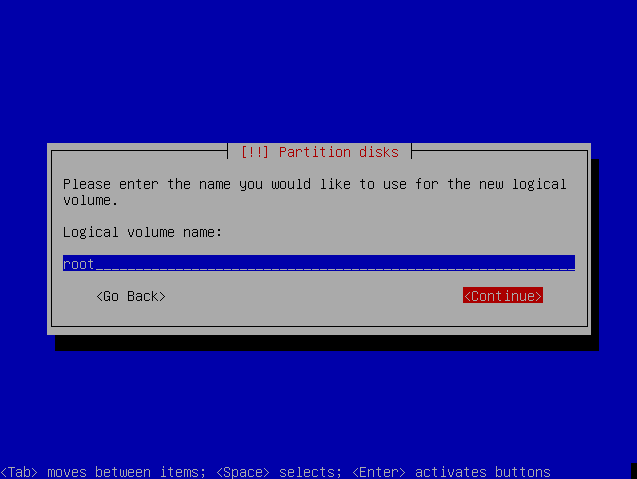
Picture 15 - Giving name to the LV
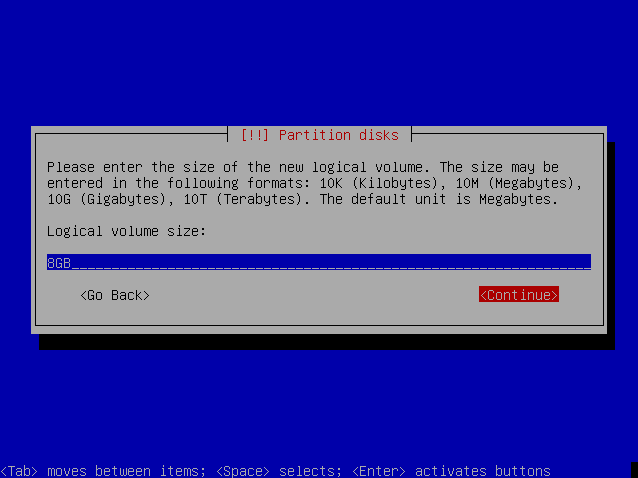
Picture 16 - Setting size of the LV
After creating the LVs I had three new entries in the disk partitioner
(picture 17). I set the file system type for each so that the "root" LV
is ext3 mounted on /, the "swap" LV is swap and the "home" LV is ext3
mounted on /home (picture 18).
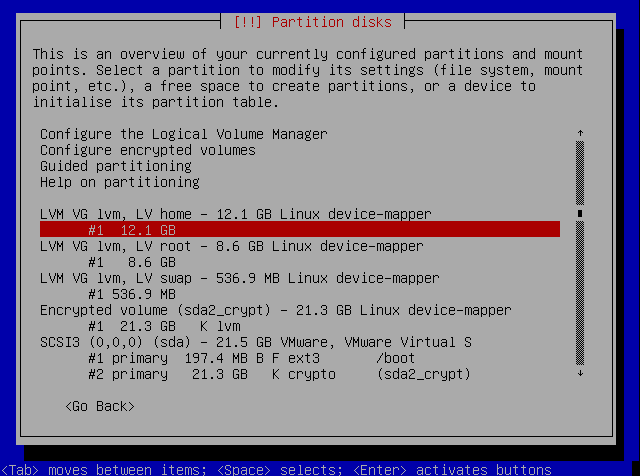
Picture 17 - Before setting the file system types and mount points
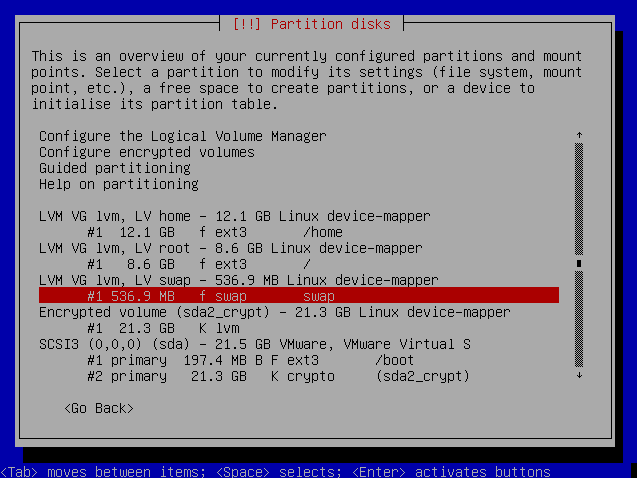
Picture 18 - After setting the file system types and mount points
Finally I went down and selected "Done setting up the partitions" and
selected "Yes" to write the changes made to the partition table (picture 19).
From this point on the Ubuntu installation is a normal installation.
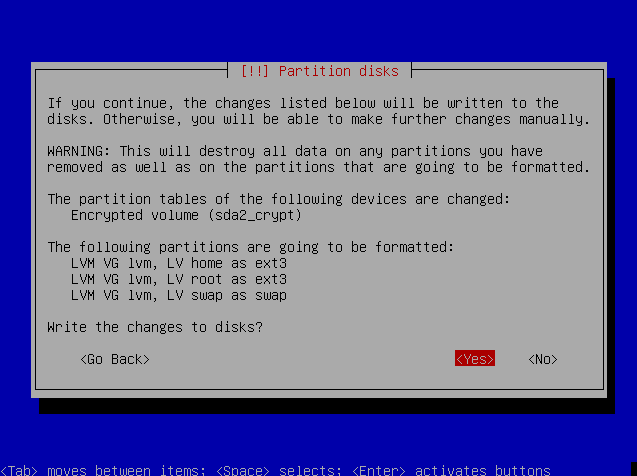
Picture 19 - Saving the changes
After installation I was prompted the encryption passphrase (picture 20).
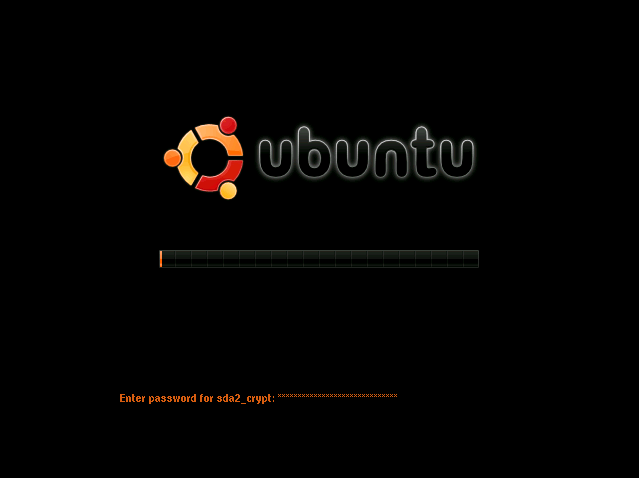
Picture 20 - The first boot with disk encryption
That's it. Now go back to My Ubuntu Installation guide and see how to easily configure your newly installed system.